Want to use your Azure Information Protection labels in SharePoint Online? This blogpost describes the way to do this.
Azure
Let’s start with some Azure Information Protection configuration within the Azure Portal.
Navigate to your AIP policy and select Advanced Properties as show in the image below.

Add the following properties (name/ value):
- SyncPropertyState : TwoWay
- SyncPropertyName : Classification
The value of the last property needs to be the same as the value for the title field in the global properties of the policy (see image below).

SharePoint Online
The next part is to configure SharePoint Online. Navigate to the library of your choice and add a new choice column. The name of the column must again be the same as the title field (see the image above). In the list of choices enter the exact label names as defined in Azure.
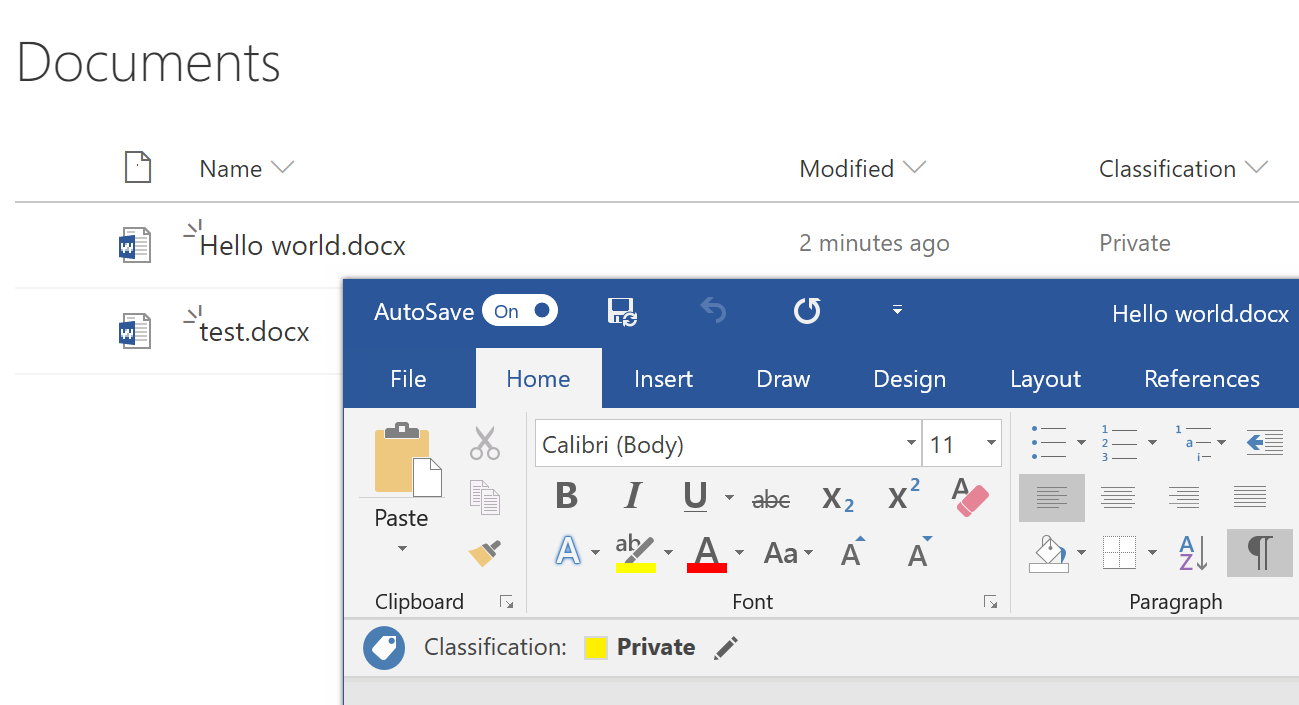
That’s it! Now we have everything in place. Create a document and add it to the library. You will see the classification label both in Word and SharePoint Online.
Remarks
This solution isn’t perfect there are some pitfalls:
- Setting the label from SharePoint Online will set the correct label, but it will not trigger the defined AIP protection options.
- A document created directly in SharePoint Online will not set the column. If you open the document and change the label it will set the column correct. Also, if you save the document locally first and then upload it to SharePoint, the column is set.
The integration between AIP and Office 365 will become better in the future, but for now this can surely be an useful solution.